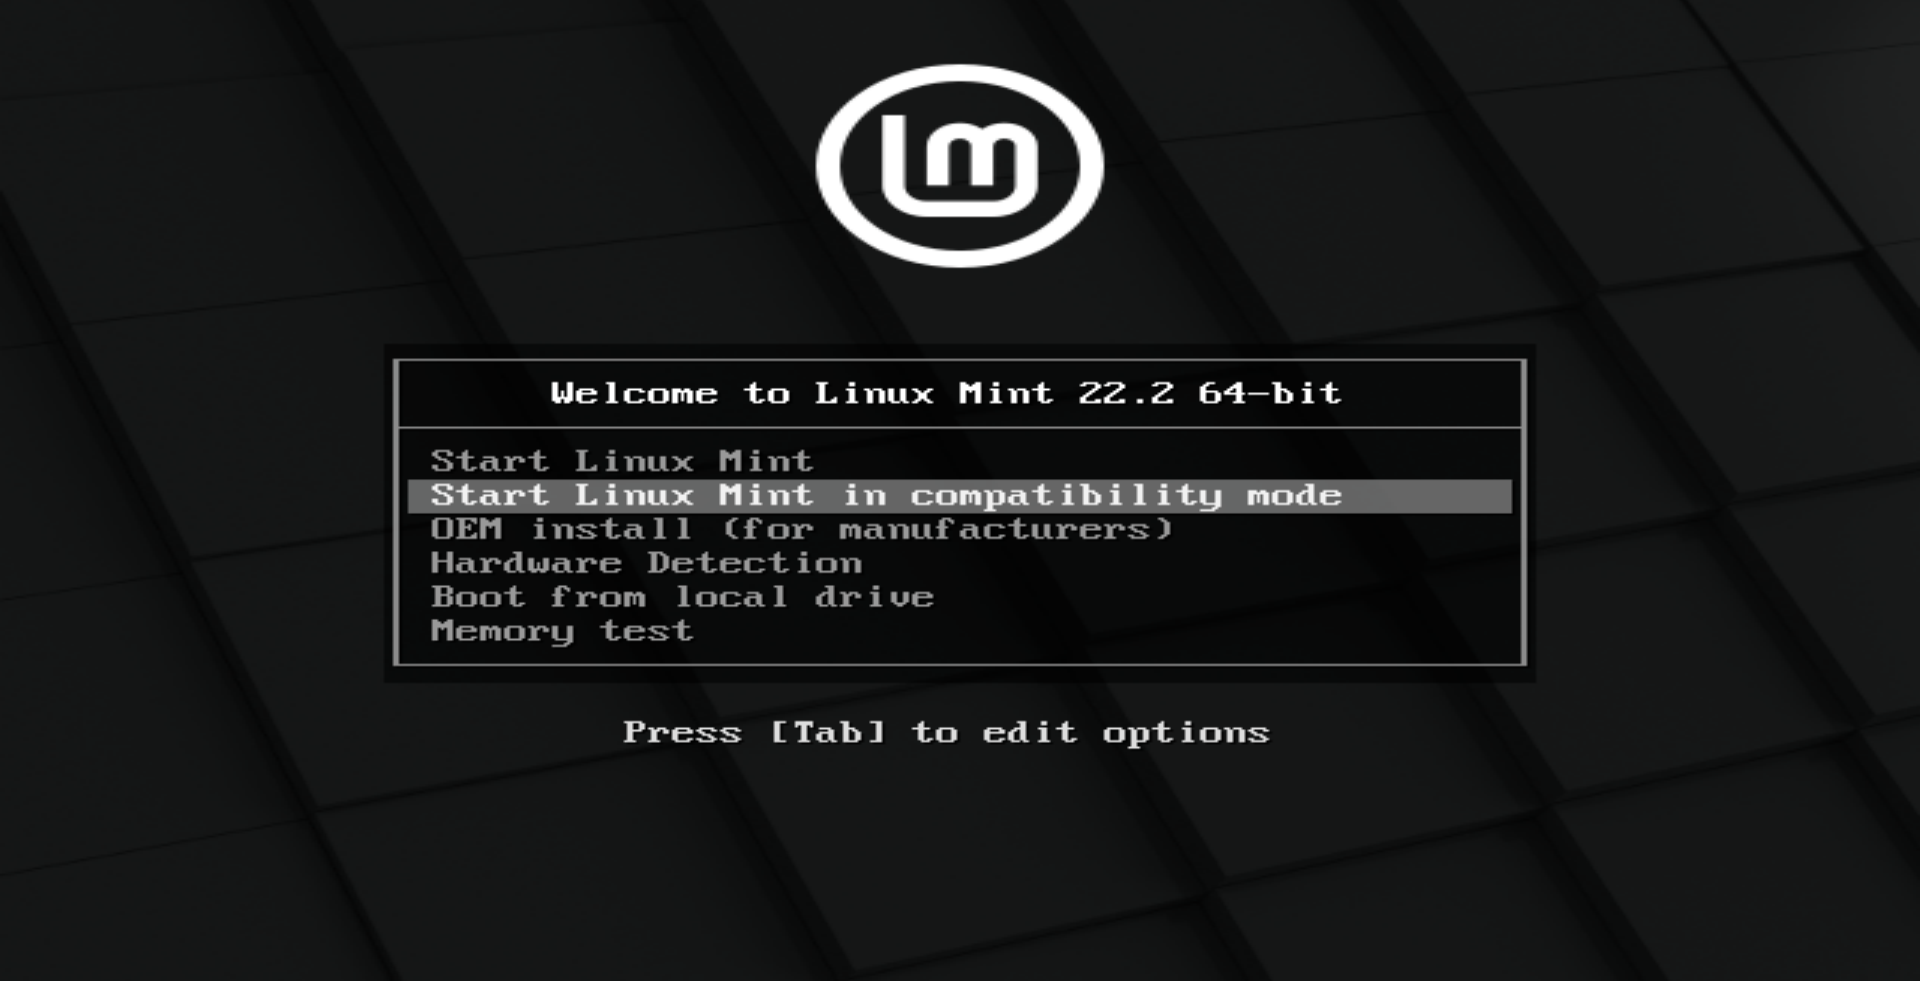
Start the System
When you plug in your USB drive and start the computer, you will see this screen. Press Enter while "Start Linux Mint" is selected to boot into the live system.
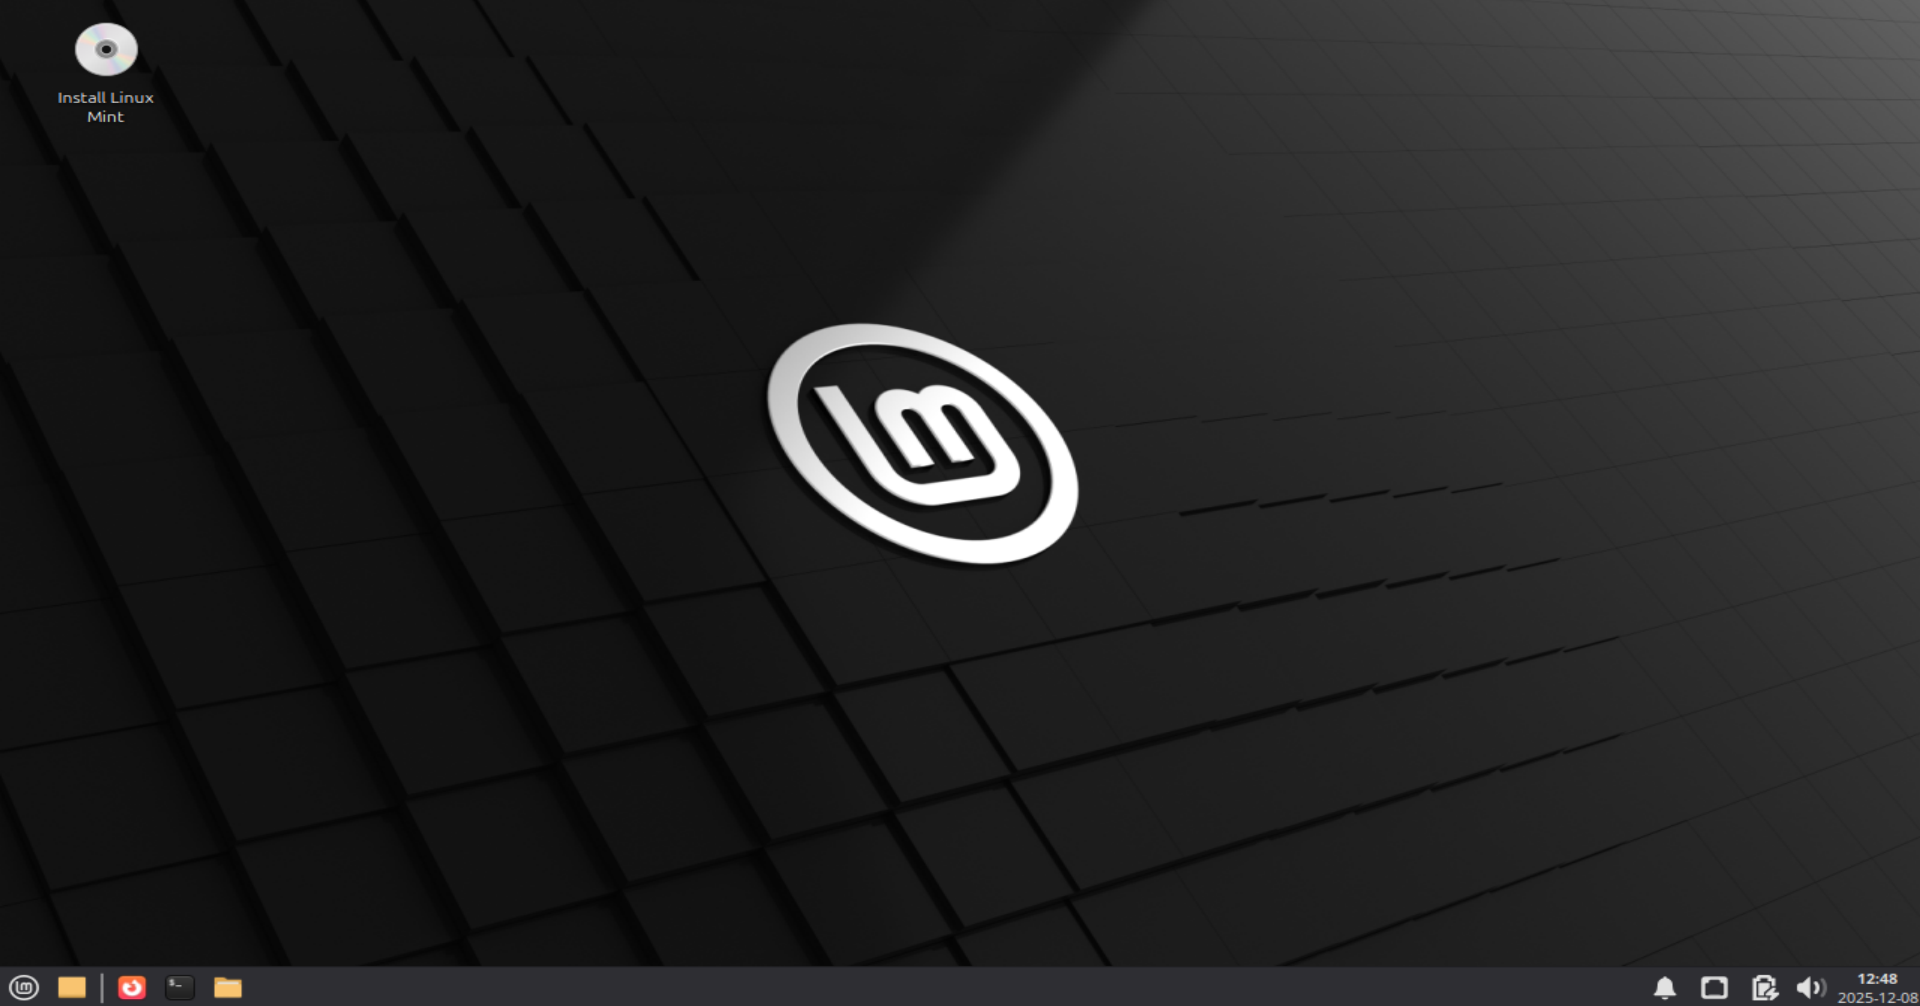
Live Desktop
Linux Mint doesn't install immediately; it opens a live session first so you can try it out. To start the installation, double-click the CD icon named "Install Linux Mint" on the desktop.
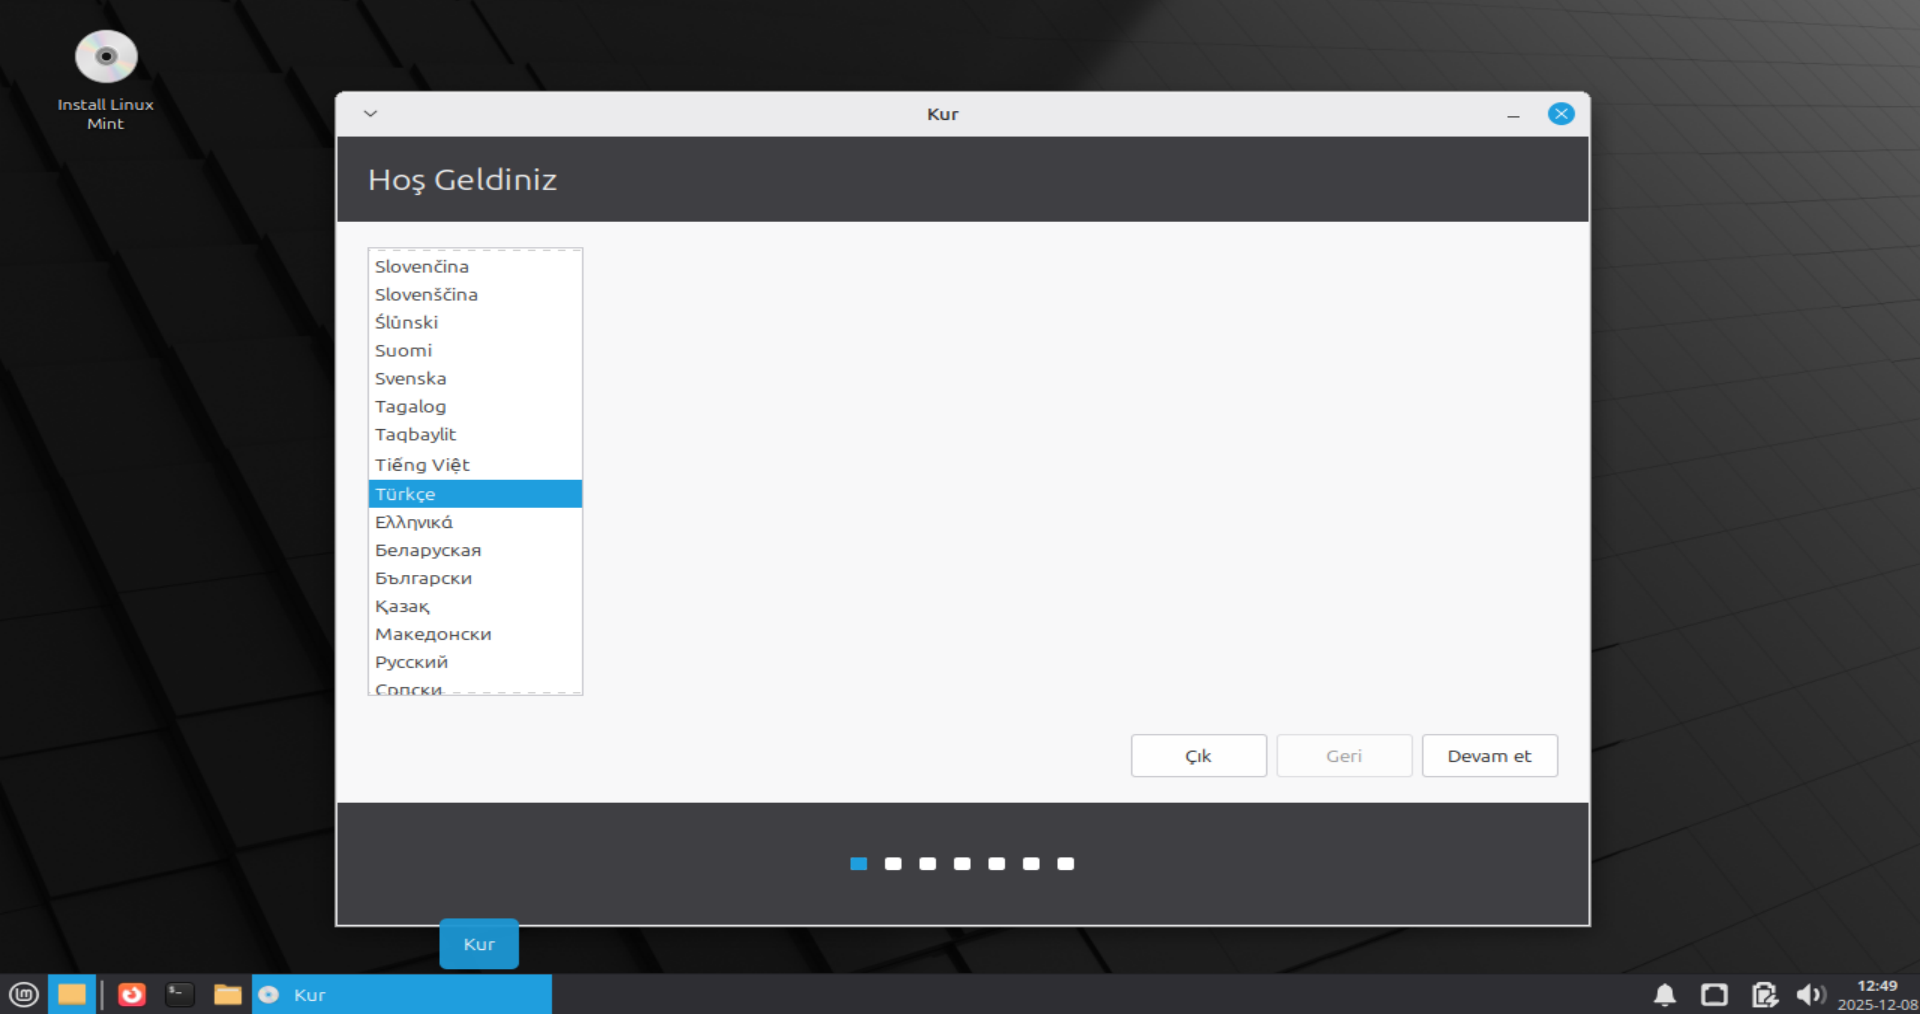
Select Language
On the welcome screen, find and select "English" (or your native language) from the list on the left. Then click "Continue".
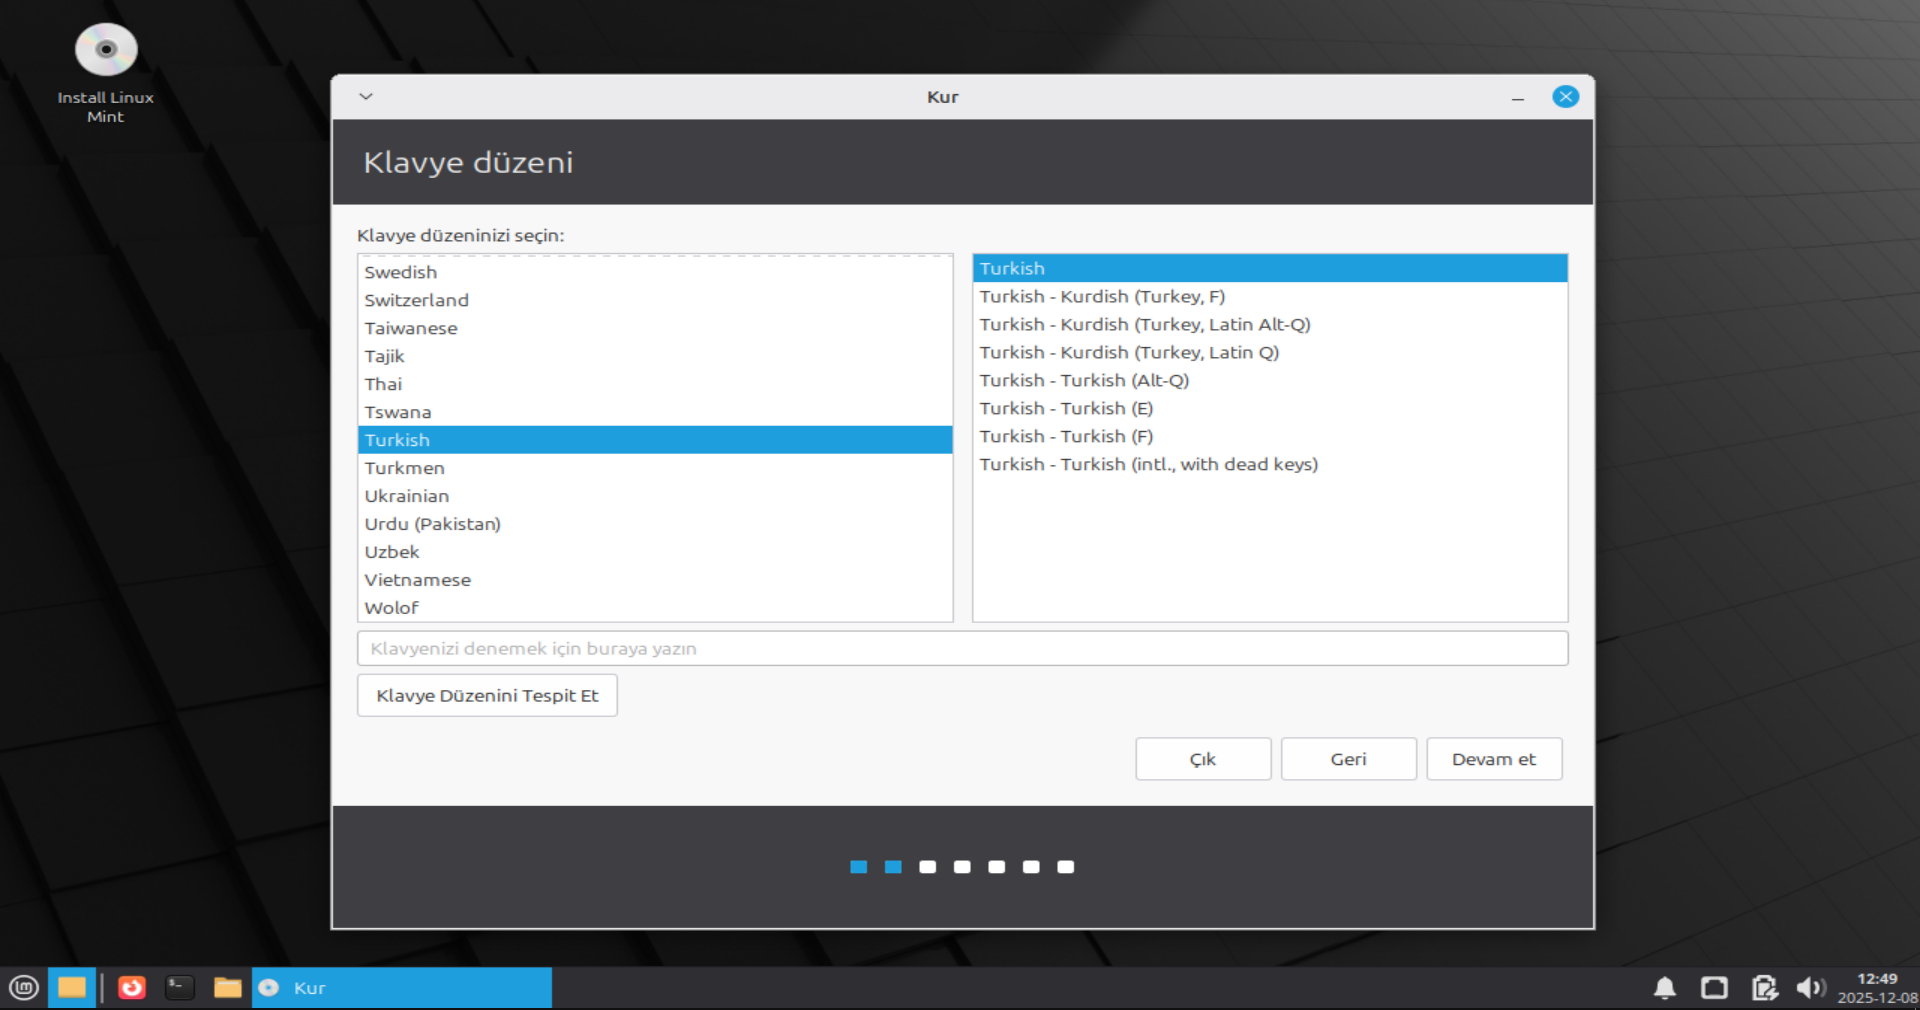
Keyboard Layout
Select your keyboard layout from the list. You can test if your keys work correctly by typing in the text box below.
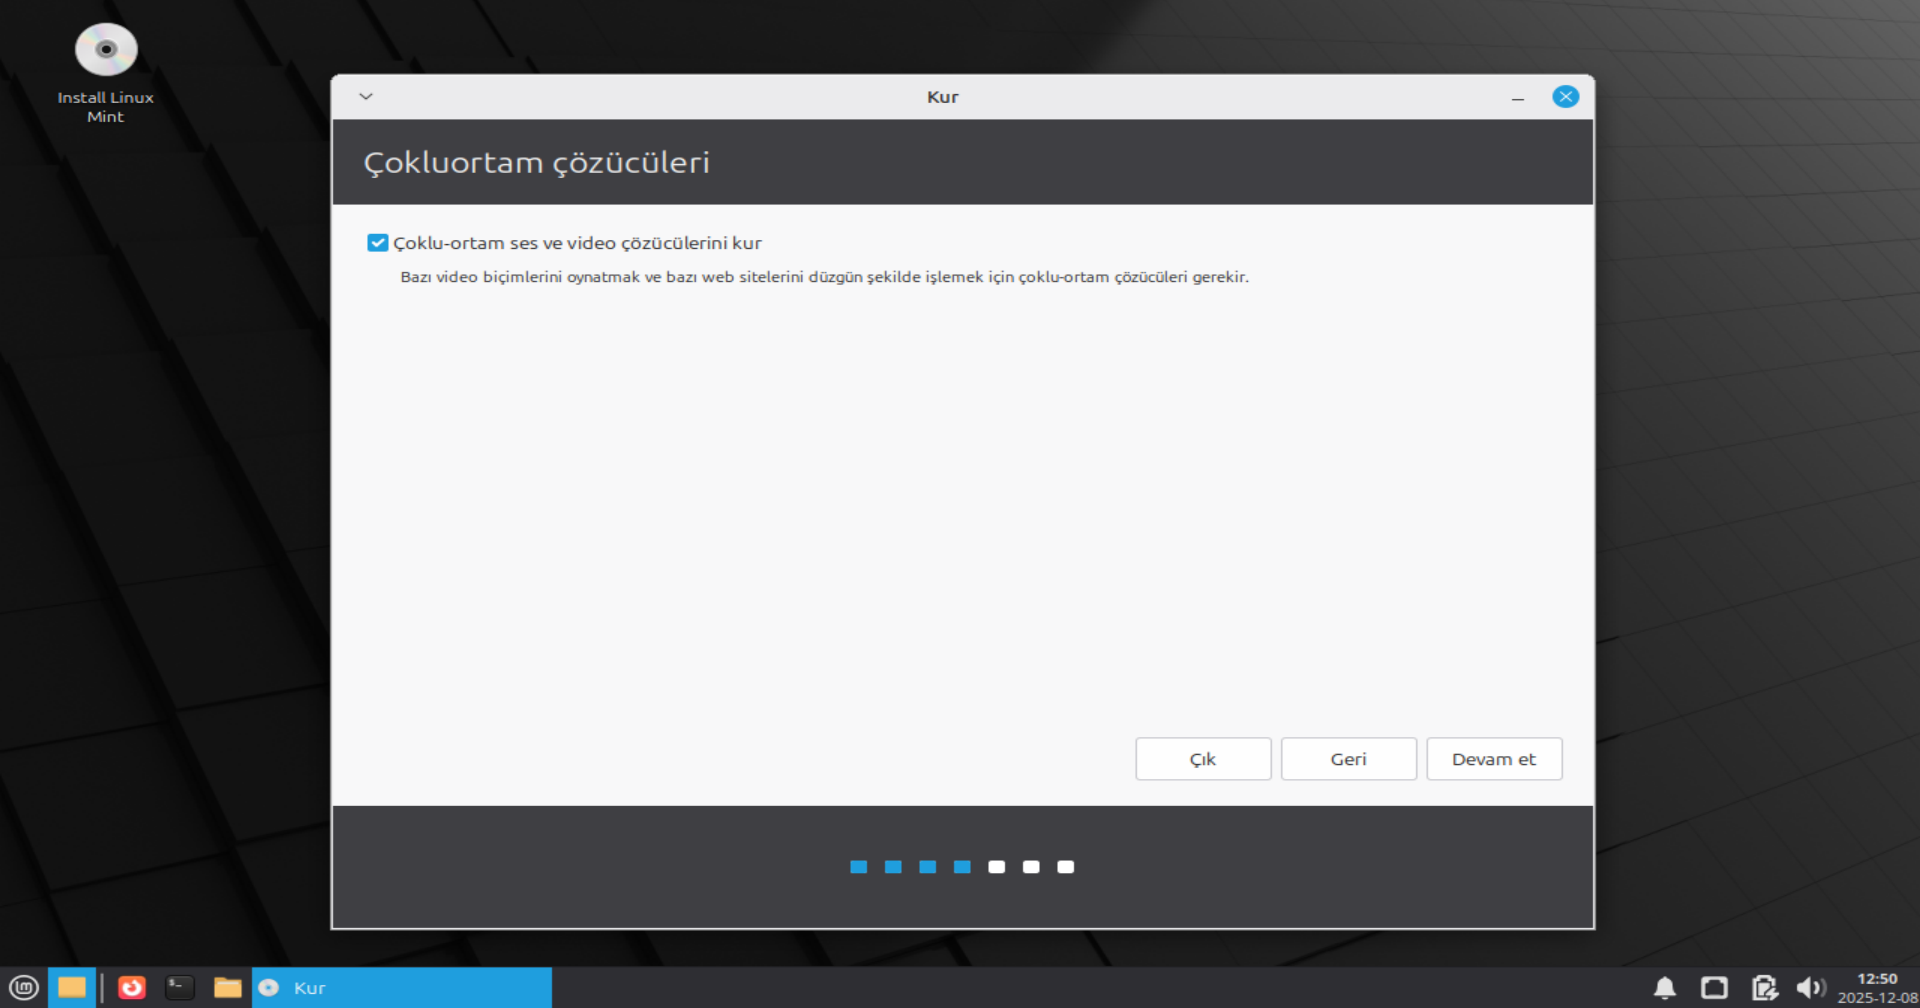
Multimedia Codecs
It is highly recommended to check the box to install multimedia codecs. This is required to play certain video formats and render some websites correctly.
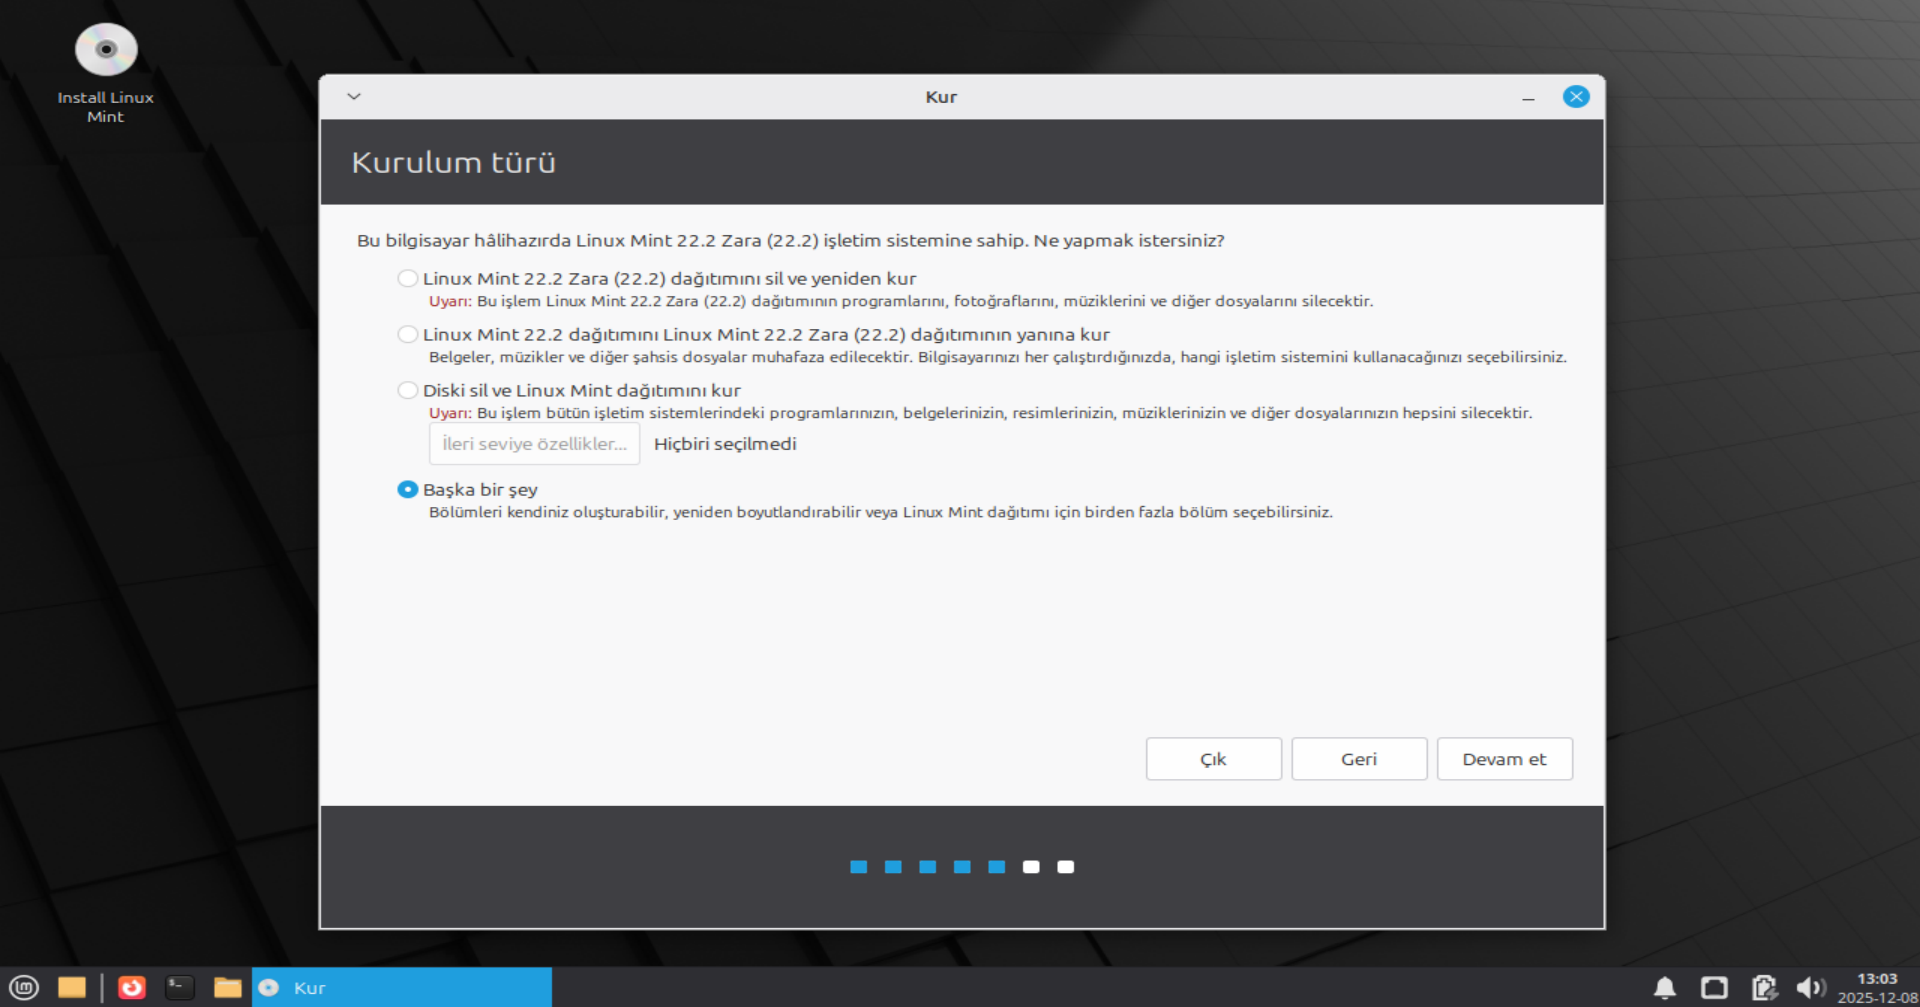
Installation Type
For the cleanest and easiest installation, select "Erase disk and install Linux Mint".
Warning: This will delete everything on the disk. Make sure you have backups.
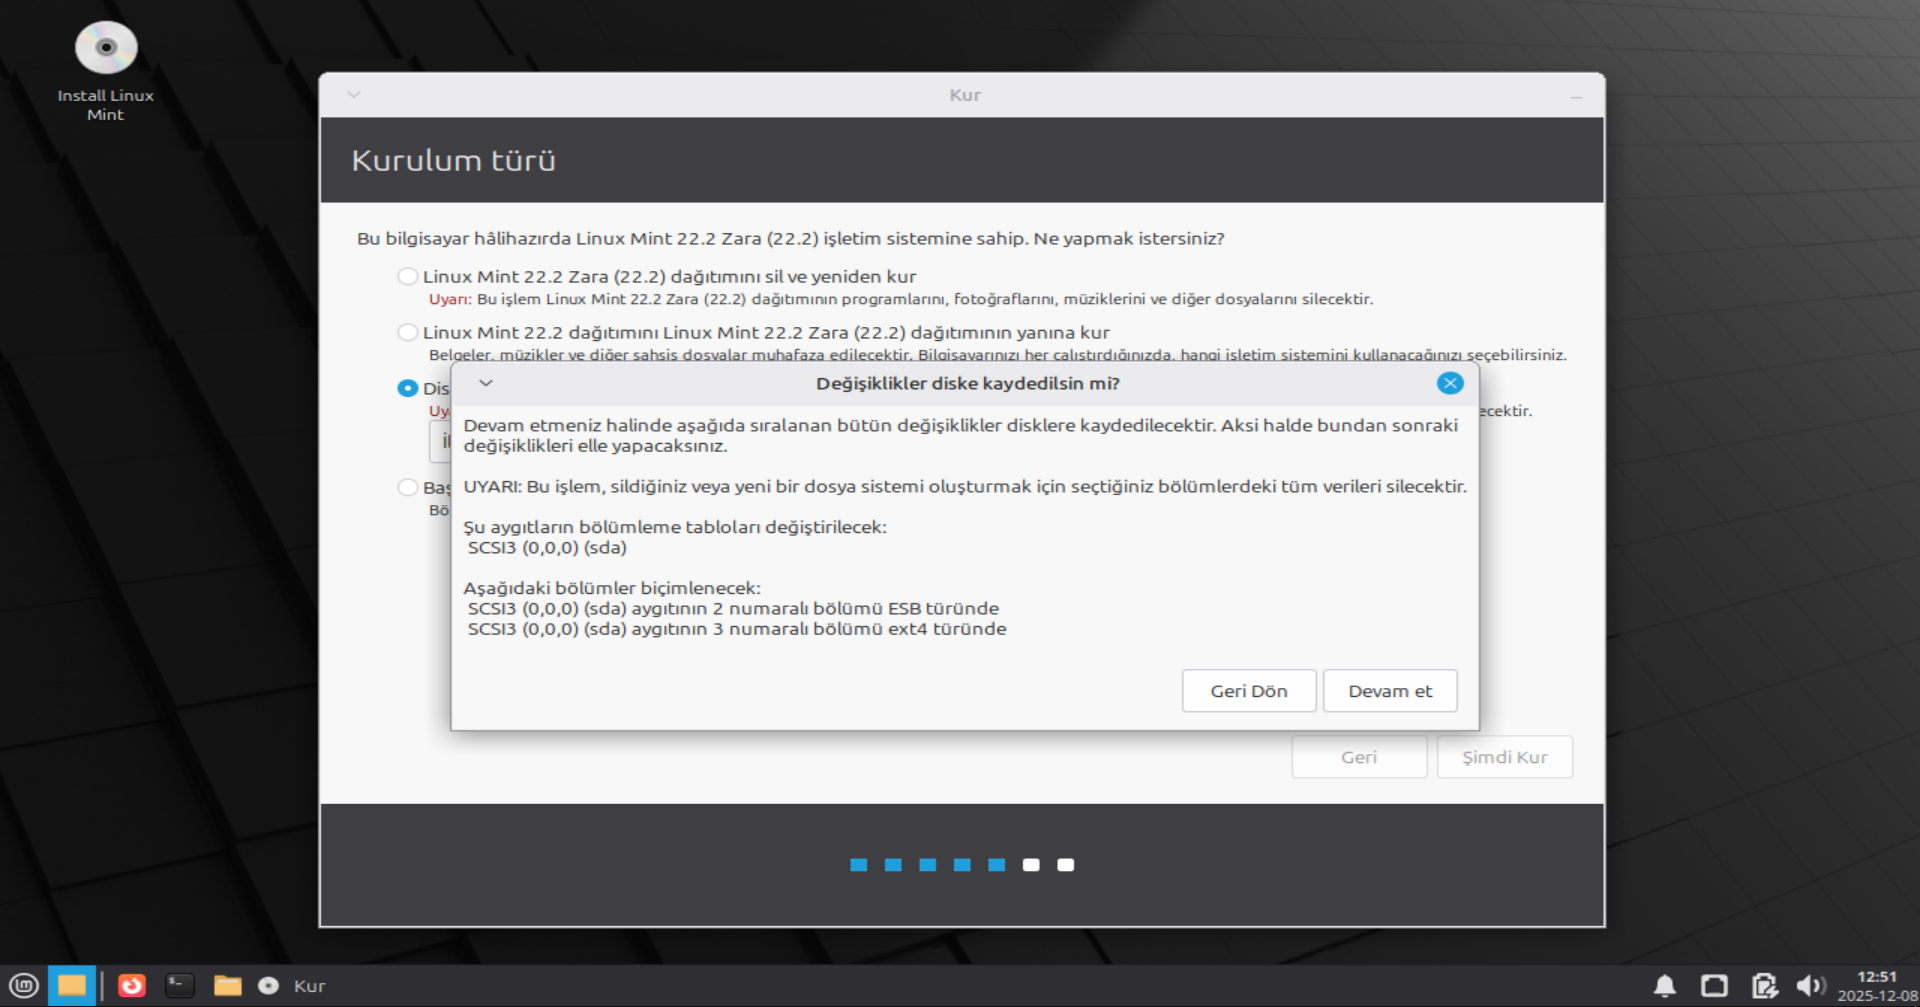
Confirm Changes
The system will show a final warning that the disk will be formatted. Click "Continue" to confirm. Partitioning will now be handled automatically.
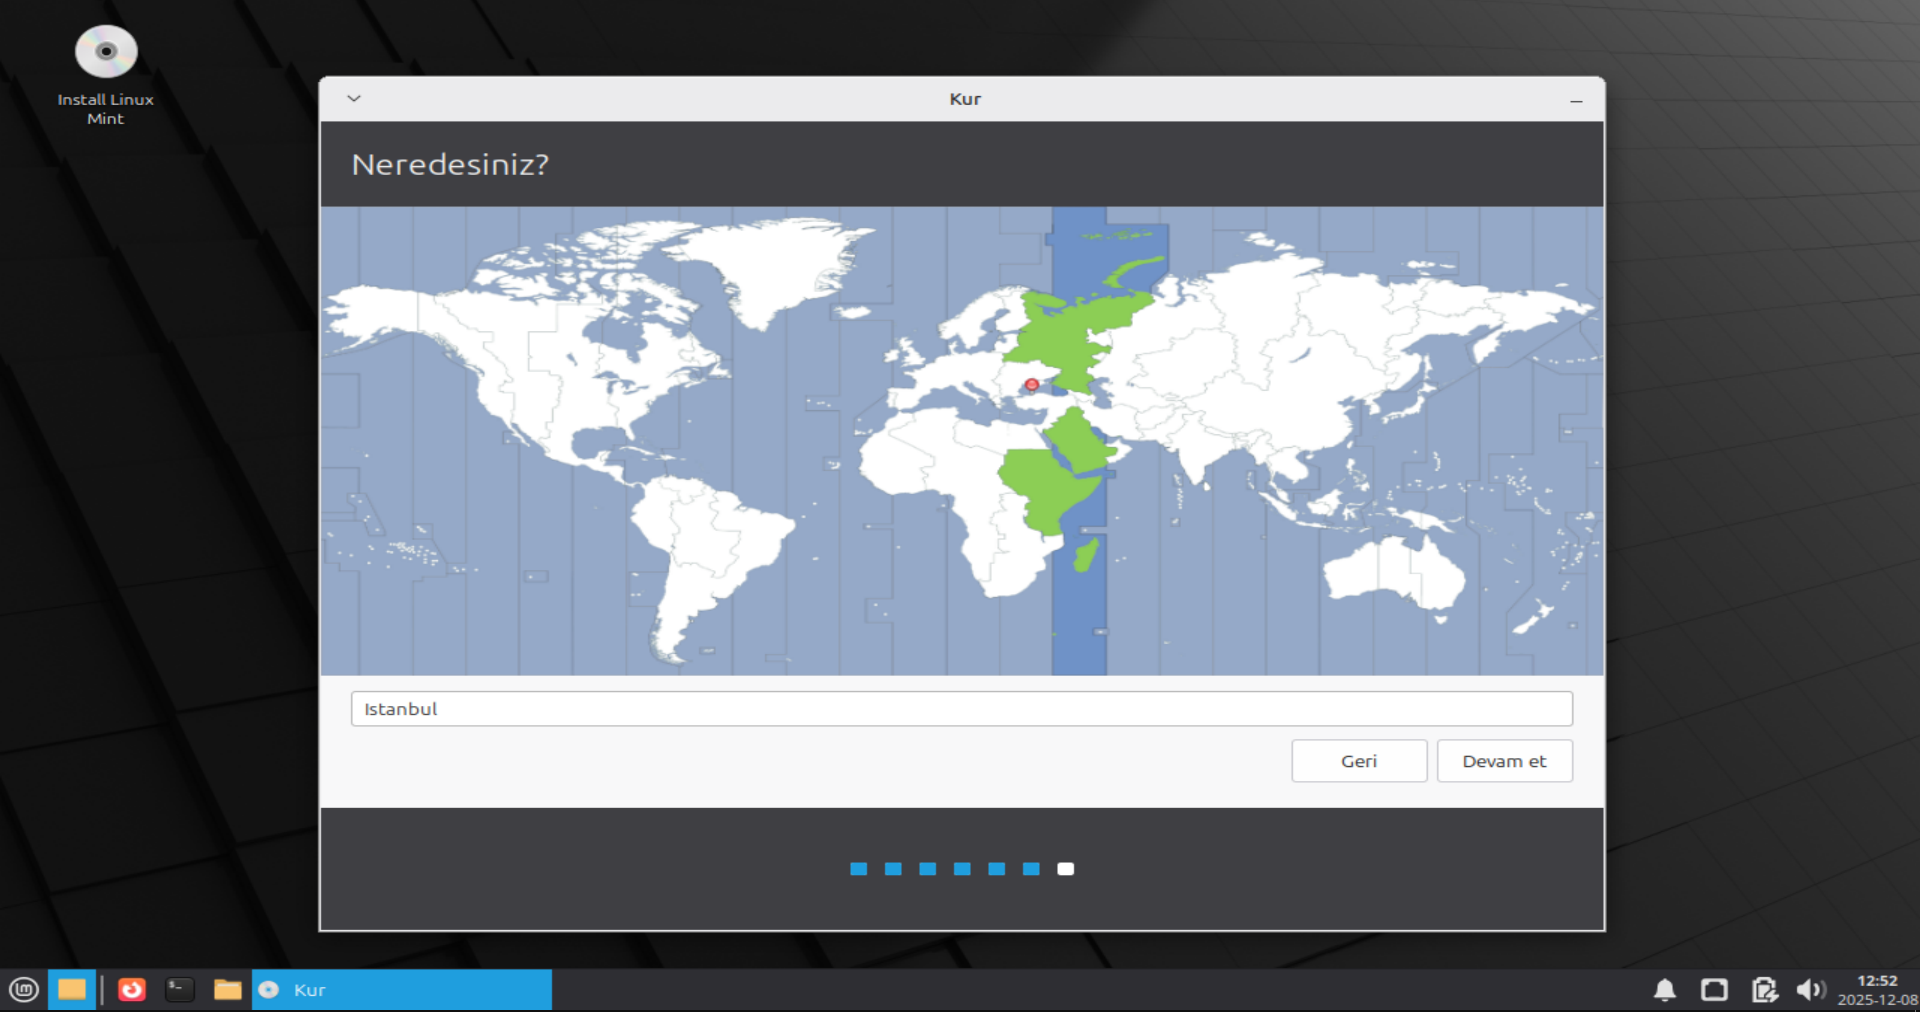
Where are you?
Select your location on the map to set your time zone. This ensures system updates and clocks are accurate.
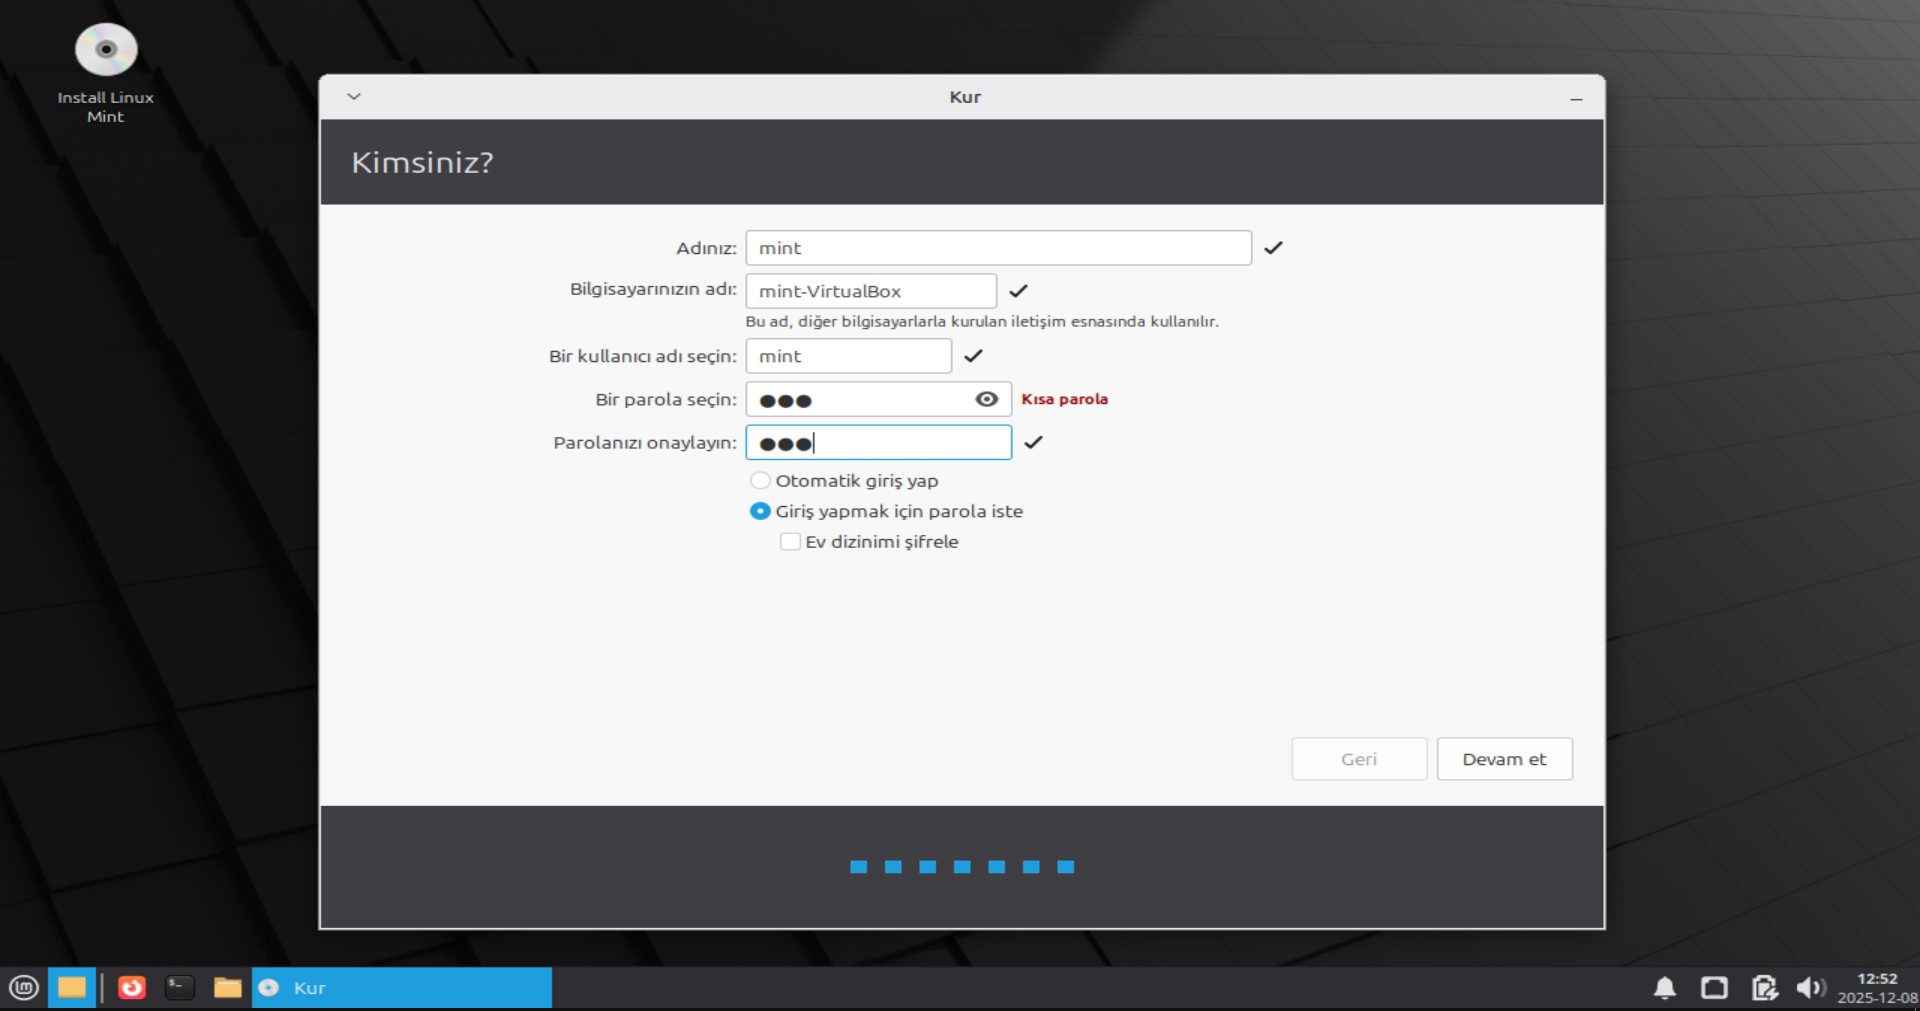
Who are you?
Enter your name, computer name, username, and password. Selecting "Require my password to log in" is recommended for security.
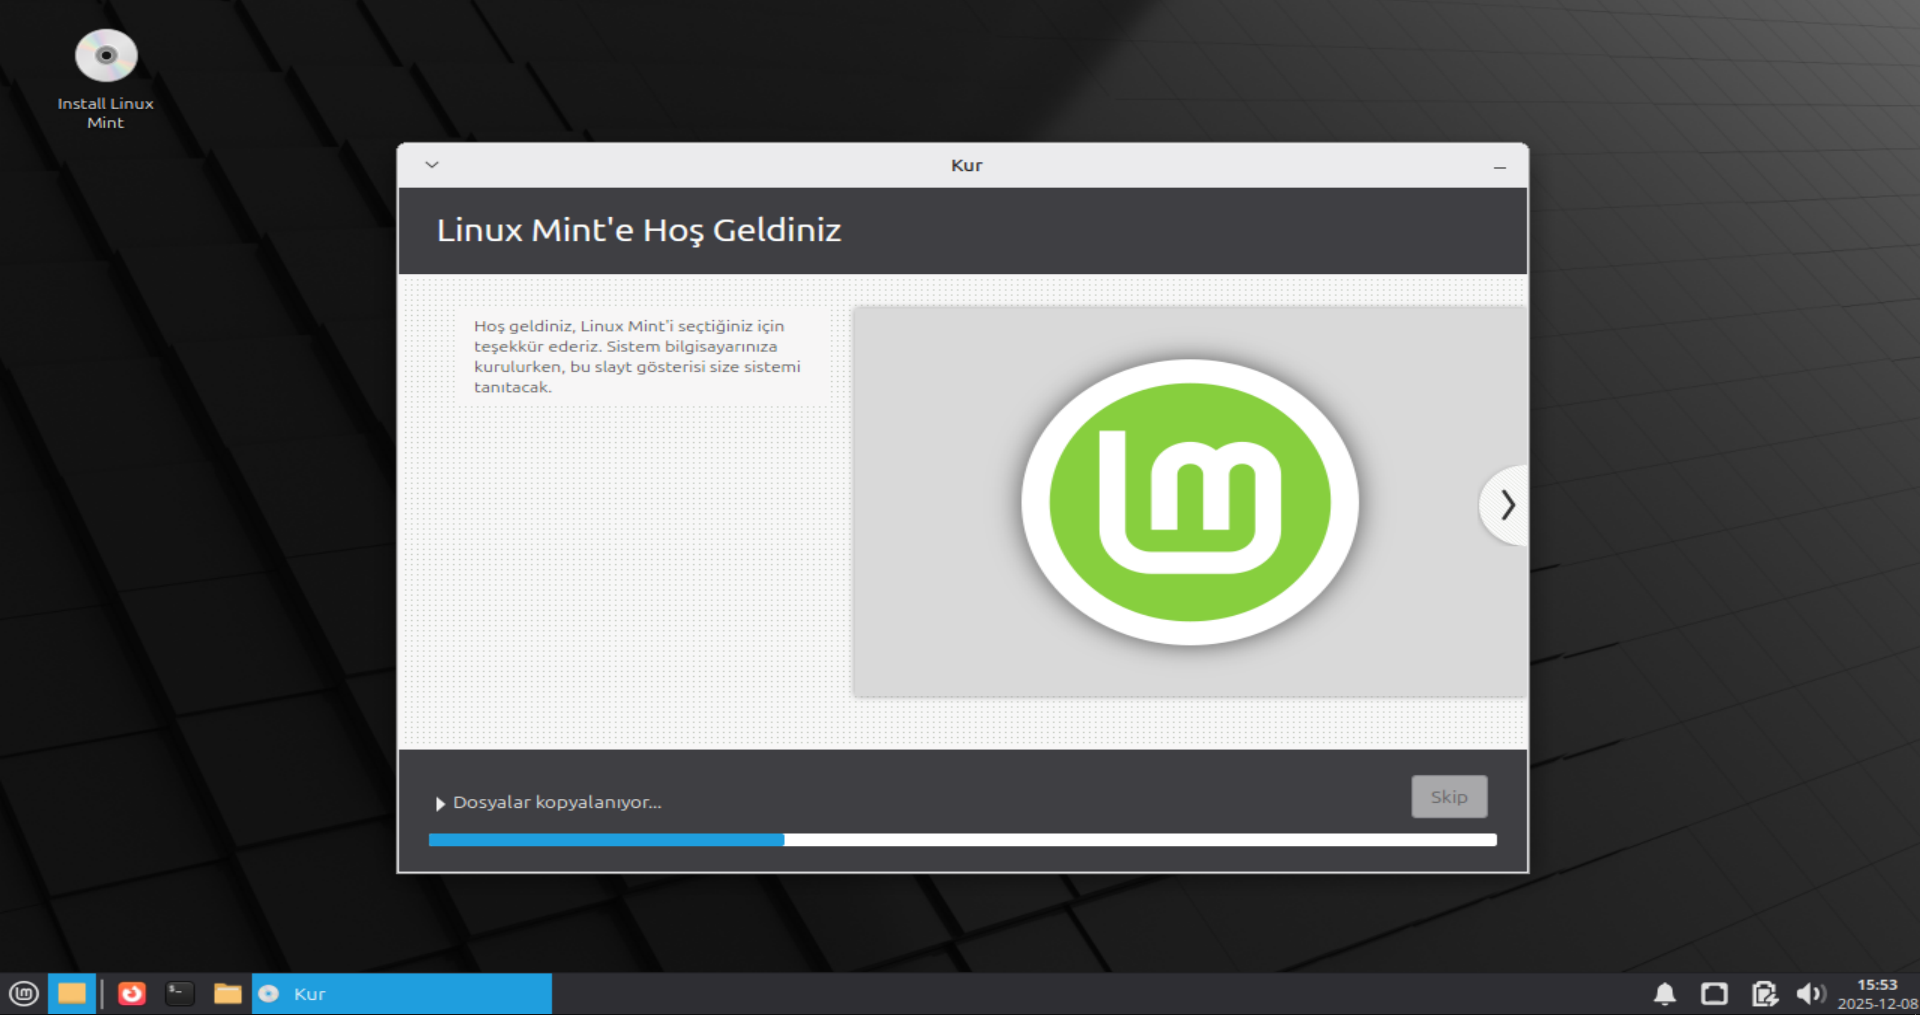
Installing Linux Mint
Installation has started! While system files are being copied, you can watch the slideshow introducing Linux Mint features. This takes about 10-15 minutes.
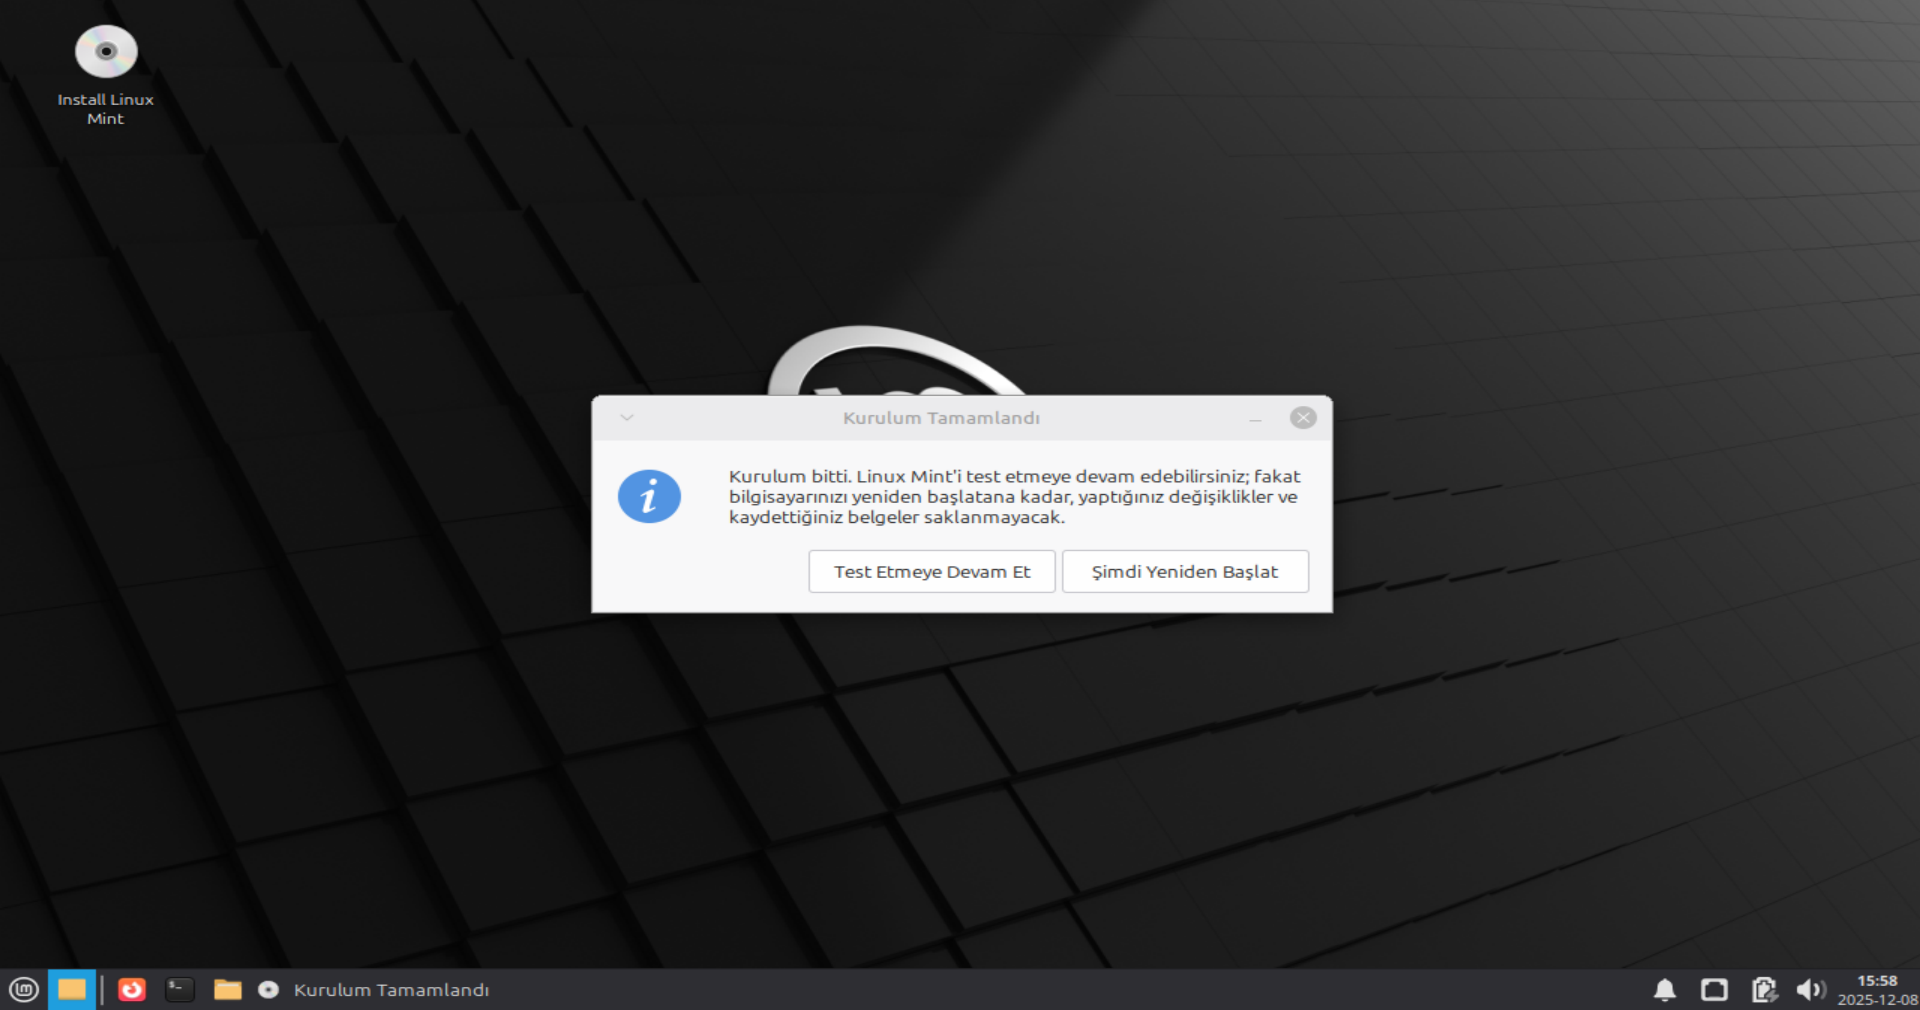
Installation Complete
All done! Click "Restart Now". When the computer shuts down, remove your USB drive and press Enter.